Every since I randomly came across these on Etsy, I decided that I would attempt to make one for my niece, Aidyn, for her birthday.
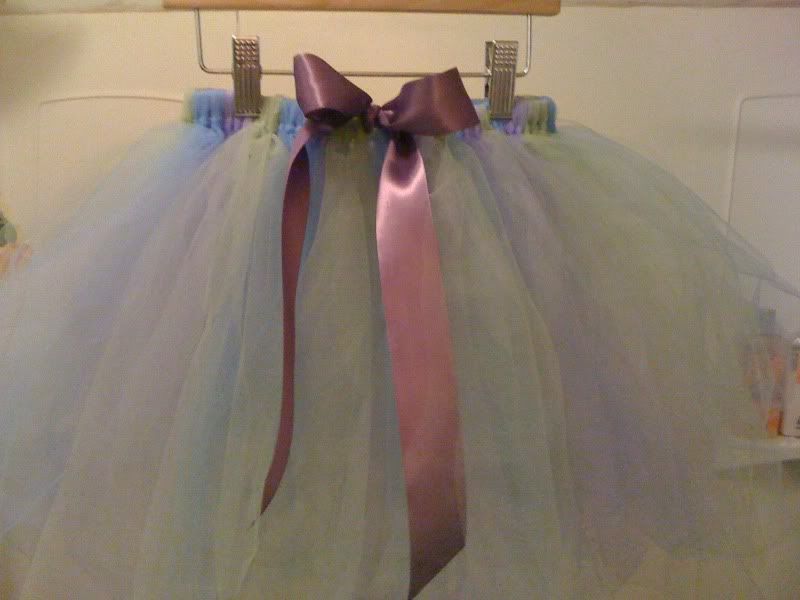
Aidyn was with me on a Joann's run a few weeks ago and I had her pick out three favorite colors of tulle for the project. She had no clue what I was buying it for, but she loved helping me chose the colors. We ended up getting two yards each of blue, sage and light purple tulle. I also picked up some elastic and a princess wand to decorate. The wand was in their $1 bins.
Her birthday party is on Sunday, so last night, I got to work. Here are some easy how-to directions on You Tube:
The only think I did different was wrap a 60 inch piece of 1" wide satin ribbon around half-inch elastic (cut and sewn to the size of Aidyn's waste)..
The whole project took me about an hour and a half, start to finish. It was super easy to make, too! I packed in lots of tulle strips and really made the skirt full. I alternated the colors by tying on three blue, then three lavender and three sage and repeating. When I was finished, I only had about 6 strips of each left over.
I am so excited about how it turned out! It is going to look so cute on Aidyn and I really hope she likes it!
I like it so much, that I'm considering making a neon green, pink and black one for myself if my sister decides to have another 80s party for Halloween this year. I am loving the tutus!
My nephew Trevor's birthday was in August, and we celebrated then with family, but he wanted to have a party when he went back to school so he could invite his classmates. He wanted to have a dirt bike helmet cake after seeing one of that style on cake central. My sister got to work baking and prepping the cakes. She called me and asked if I could help with the decorating because the odd shape and weight might be tricky for one set of hands to take on alone. Of course, I obliged!
This cake took a while to complete. When I got to her house, she had the cakes stacked and cut into the helmet shape. We worked to add the front section (mouth piece) and cut out cardboard for the top. After icing it with butter cream, we rolled out the fondant and covered it. We mixed up some accent colors for the stripes and piped some designs (the big "T" on the side and a smaller "Trevor" by the front.)
We've been working late into the night on our house lately. We really want to get if finished as soon as possible, and there is still a ton (seriously, a whole heck of a lot) of work to do before we can move in. Our weekday schedule consists of our 45 minute commute, a full day at work, a 45 minute drive back and a quick dinner before we head over the the house and work for 4 or so hours. Weekend time is split between home improvements and trips to the home improvement store. I see yard sales everywhere, but have to use all my will power to stay focused on the task at hand and not stop and waste time. (Although, in my book, a yard sale is never really a waste of time.)
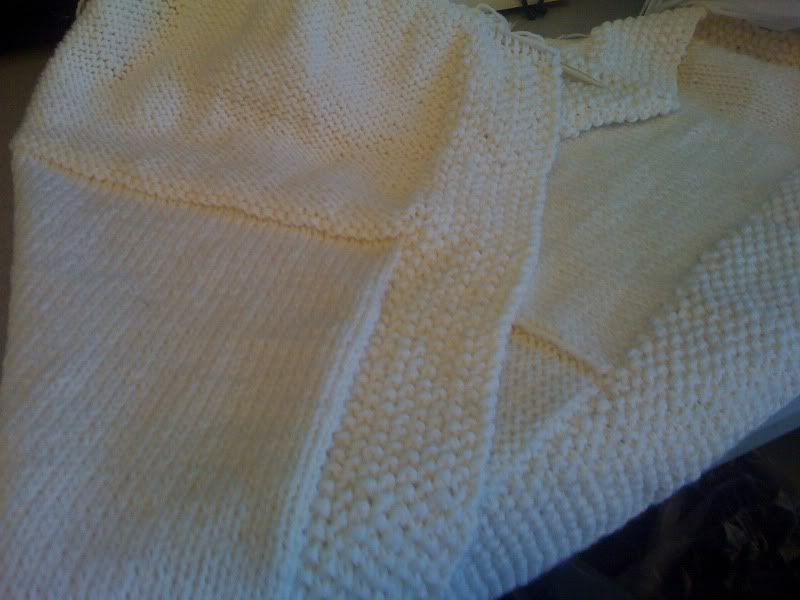
I realized on Sunday that my friend's baby shower is about a month away. I put a good week in to knitting that baby blanket when I first started, but was not near finishing it. I found that I can get some solid knitting time in during our daily commute if Chris drives to work. Just yesterday, I added about 6 inches to the blanket. Not too shabby!
Here are some photos of my progress. I'm about three-quarters of the way finished.
This one better shows the seed stitch border and the contrast between the knit and purl stitches.
Right now, I'm in good shape to have this thing finished long before the shower. Maybe I'll even have time to knit up a matching pair of baby booties!
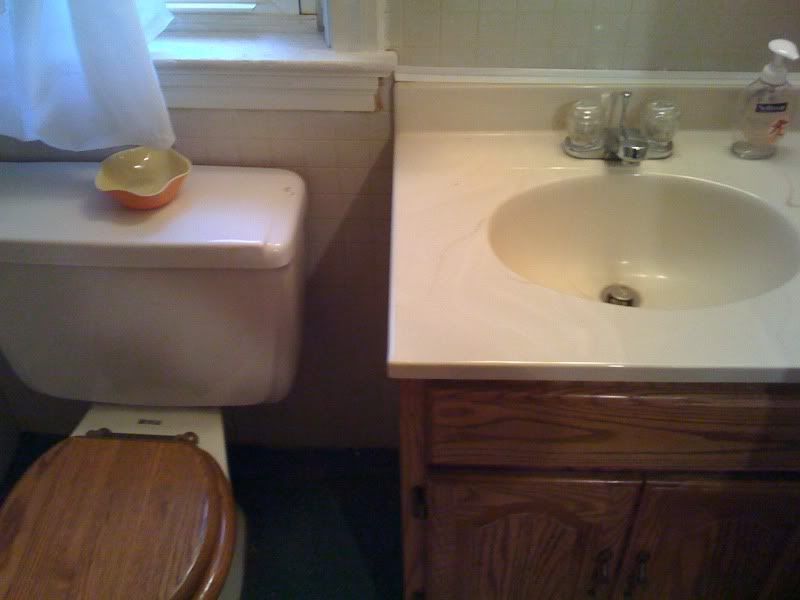
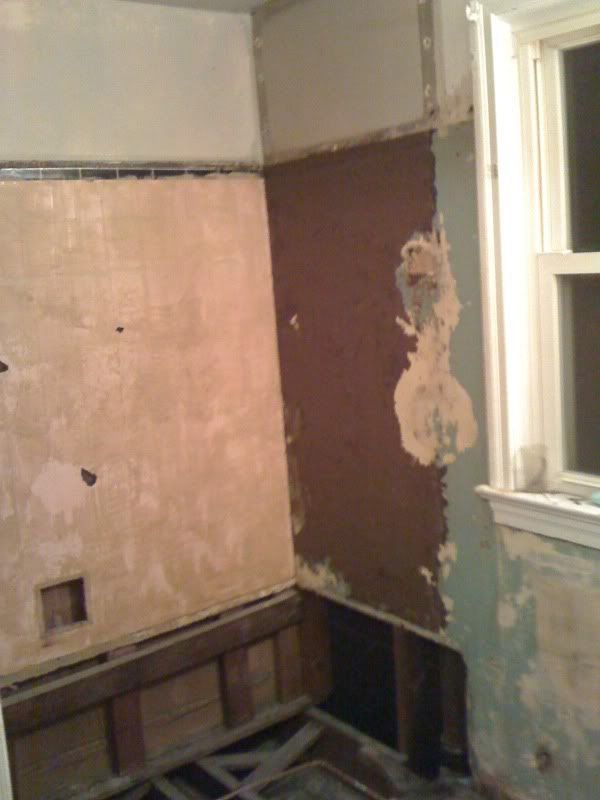
When Chris' dad redid the plumbing, he had to remove the old cast iron tub. We decided to replace it with a wider, deeper tub, complete with a tube surround so we could also have a shower. (This bathroom originally lacked one.)
The plumbing also required the replacement of the stink pipe. The original was also cast iron, and after a few decades of use, this sucker was almost completely clogged with remnants of granny poo. I seriously don't know how anything she flushed made it down that pipe.
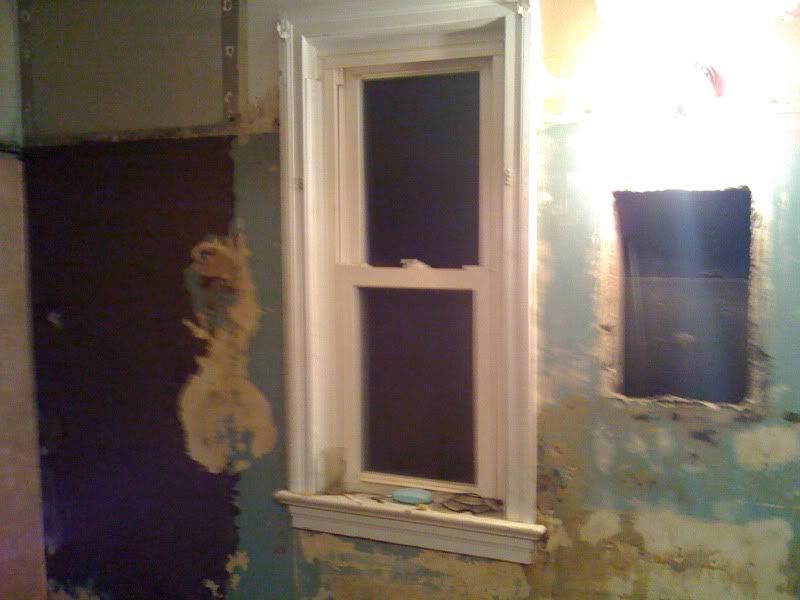
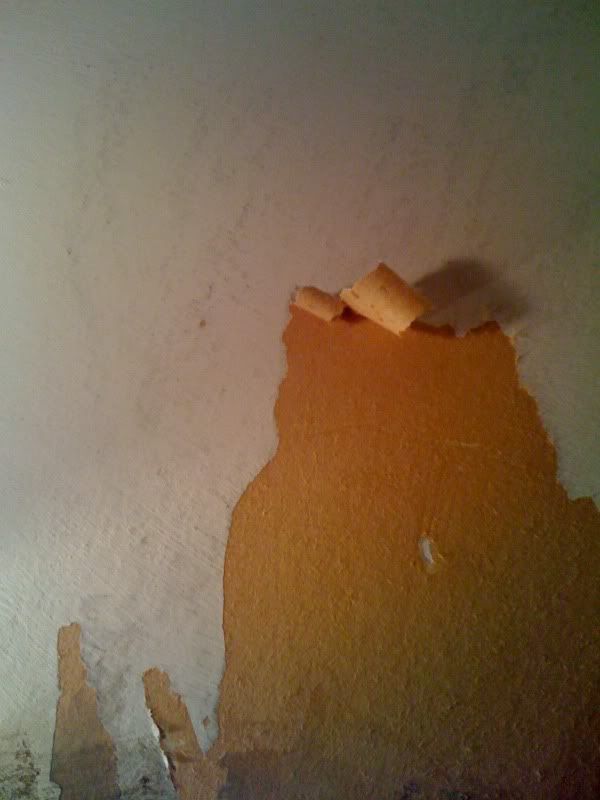
Along with the new plumbing, we had to remove the toilet and vanity sink. From there, we decided to remove the faux tile paneling and medicine cabinet. Of course, while we were at it, we had to remove the painted on wallpaper and there residue left behind from the glue holding the paneling.
Who would have guessed the wall would be blue under all of that? Wonder if it's the same paint they used in the addition?
Scraping this off was terrible. I got a few good strips off with a paint scraper, but I ended up having the best luck with a Brillo pad. Fun times in home renovations, people. Fun times!
A church friend recently had a baby shower and the invitation encouraged all guests to bring a book for the baby instead of a card to accompany the gifts. This is a cute idea because it helps build the baby's library. I was trying to think of what gift to give them and was a little stuck. With all of the new home expenses, I was feeling a little poor and the handful of items I could afford from her registry were either already purchased or not too exciting to give. I'm normally a registry-gifter, so I kind of surprised myself by going the DIY route on this one.
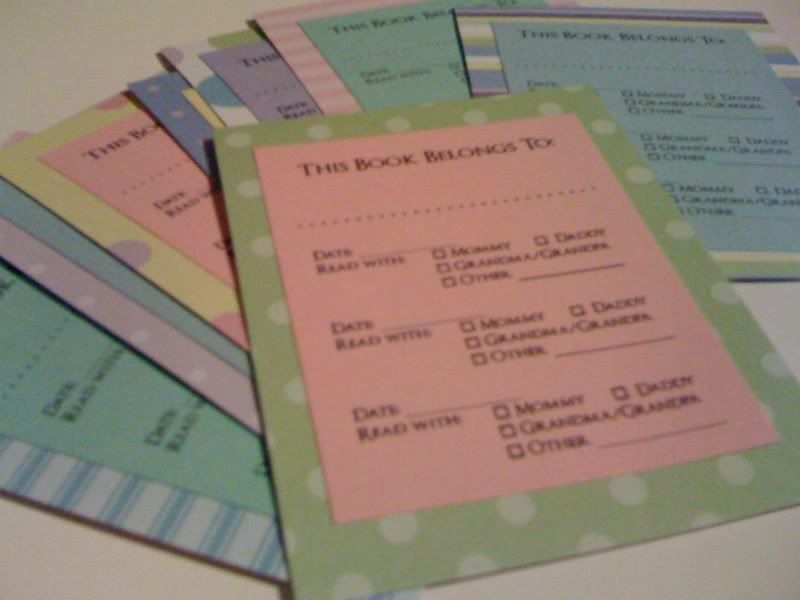
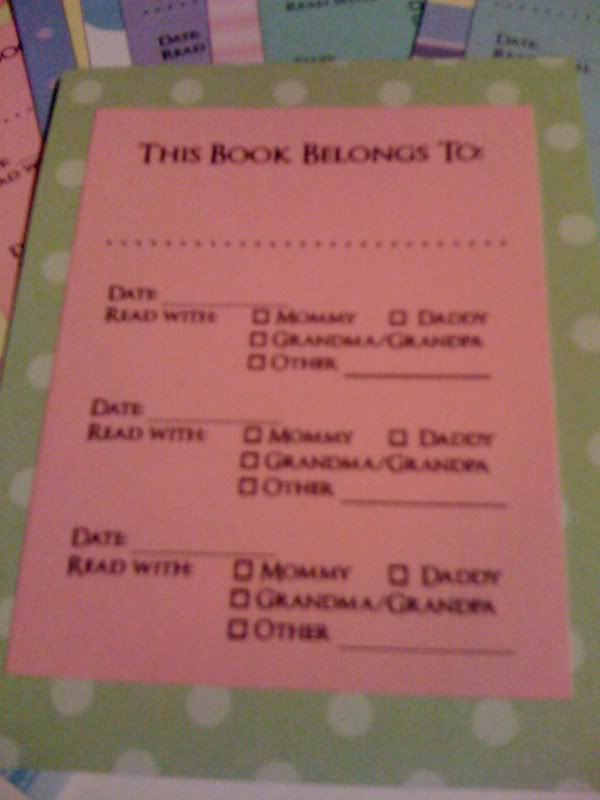
The idea for the gift just kind of hit me. I thought it would be cute to make a little book plate for the book/card I'd buy, so I raided my craft supplies for baby-themed scrapbook paper. I didn't really have much, but I did have a tablet of pastel stripes, polkadot and patterned paper that would work.
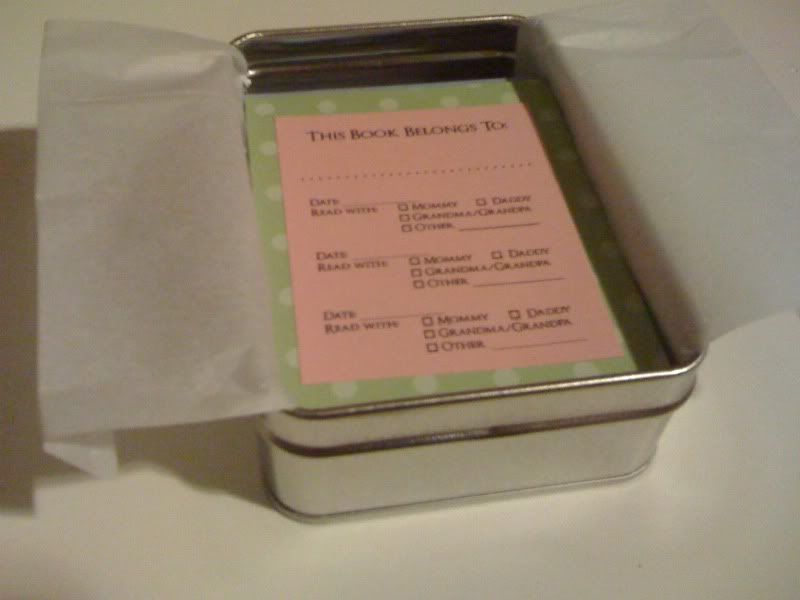
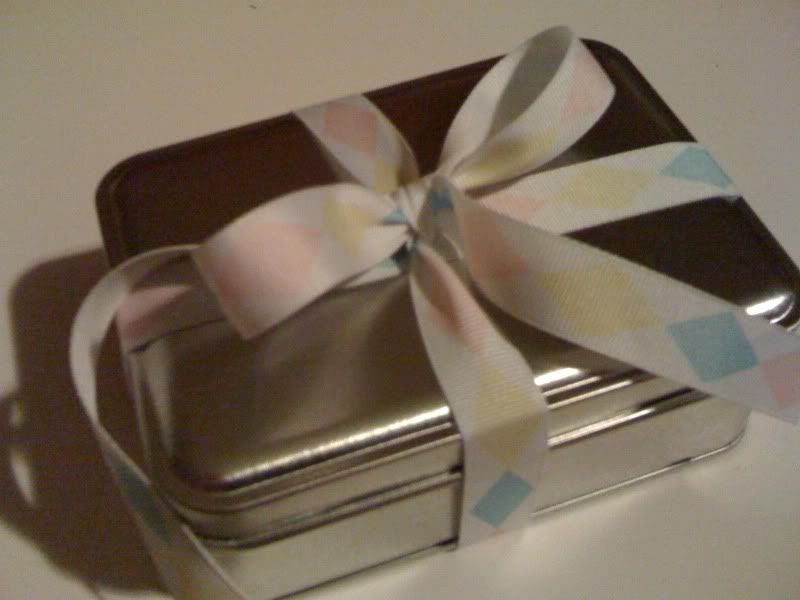
I made a quick design in Adobe Photoshop Elements, printed it out on pink cardstock and matted it on a rectangle of pastel striped scrapbooking paper. I was so happy with how it turned out that I decided to make a bunch of them and give them as a gift. She was going to be getting a lot of books for the shower if everyone complied with the no card request, so why not? I picked up a small tin and a spool of cute $1 ribbon at Michael's for the packaging and then got to work on making the book plates.
I changed the design to be a little more unique. I like how the book plates can also serve as a journal for keeping track of when and with whom the book was read.
Here's the final product:
A close up of the text:
I used photo square stickers as the adhesive for placing them in the books. All you have to do is peel off the backings and stick them inside the front cover.
Here they are in the tin:
And here they are all wrapped up and ready to go:
I think the whole project took me less than an hour. The longest part was cutting out the book plates and rectangles for matting.